
An Oracle deck is a series of cards with images or words on them that can be used for divination, goal-setting, to lift your mood, or to connect with your intuition or a higher power. Each deck has a theme, and really, anything goes. There are many oracle decks out there with a variety of themes, such as lunar phases, animals, angels, flowers, or archetypes.
The beauty of this diversity is that it’s easy to create your own oracle deck! A little creativity and some art supplies and you’re ready to start crafting a gorgeous, personalized oracle deck that’s perfectly suited to your needs.
How Are Oracle Decks Different From Tarot Decks?
Oracle decks differ from tarot cards in three ways.
- A tarot deck contains 78 cards, and an oracle deck could be any number of cards.
- Tarot decks have major arcana cards and minor arcana cards divided into four suits. An oracle deck can be structured similarly, but there are no set rules around it. Usually, the theme dictates the structure of the cards.
- Tarot cards are usually read in spreads of multiple cards. Oracle cards tend to be read one card at a time, though spreads are also used occasionally.
Why Create Your Own Oracle Deck?
Maybe you’ve experimented with other oracle decks and felt your intuition nudging you to make your own. Maybe you’re working towards a goal and want a personalized deck that speaks directly to your hopes and dreams.
Whatever your reason, I say go for it! There is power in creating something inspired by your intuition. Intention is the “secret sauce” behind spells and magical tools, and when you make something from an idea in your head, it’s supercharged with your personal power.
Let’s Get Started!
Step 1: Check Out Other Oracle Decks.
Head on over to Pinterest and check out the different oracle decks that others have created. Which decks are you drawn to? Do you like larger cards or playing card size? What shape do you prefer? They don’t have to be rectangles if you like circles or triangles! What colors schemes catch your eye? Notice the intentions behind each deck. Some are geared toward divination, while others are all about adding a little inspiration to your day.
After browsing what’s out there, you’ll start to see some patterns. Most oracle decks fall into one of two categories: topical or character-based. For example, a topical deck might have a different affirmation on each card. A character-based oracle deck could have a different animal on each card.
Step 2: Brainstorm Themes for Your Cards.
Now that your brain is brimming with great oracle deck ideas, take some time to jot down ideas for your own deck. As you’re doing this, let your creativity flow. Write down every idea that pops into your head without judgment or censoring. You might surprise yourself with the themes you come up with.
If you get stuck, think about the things in your life that “feel” magical and spark something inside of you. This could include nature, sacred spaces (in your environment or in the world), magical tools you use in your rituals, shapes, people you admire, characters from books, musicians, affirmations to keep you motivated, food, quotes, or poetry.
After you settle on a theme, make a list of all the individual card design ideas around this theme. Decide if you want to include words on the cards or just an image. Sift through the design ideas and pick the ones that resonate with you most (even if you don’t know why). Plan out as many or as few cards in your oracle deck as you want. This deck is uniquely yours, so you get to make the rules.
Step 3: Pick Your Materials.
You have a lot of options here. You can head to your local craft store and buy your materials, or just use what you have on hand. Witches are resourceful people, and I think it’s fun to go looking around my house for unconventional art supplies.
Here’s what I’ve used to make oracle decks:
- 4 inch by 6-inch note cards – These are great because they’re all the same size and sturdier than regular paper. Plus, they’re already card-shaped. No cutting required!
- A pad of cardstock – You can trace your cards on this paper and cut each card out. This gives you more freedom with card shapes and sizes. (And keep in mind, no one said these cards have to be rectangular. Circles, triangles or hexagons work, too!)
- Cardboard from cereal boxes, cracker boxes, etc – This thin, firm cardboard will make for durable oracle cards. And it’s a magical way to recycle stuff you already have in your house! I usually paint over the cardboard with white, so I have a blank canvas for my card designs.
- Elmer’s Glue – It always comes in handy.
- Gloss Medium or Mod Podge – This can be used for adhering paper to non-paper materials, or for image transfers.
- Paint brushes – You can use these with paint, glue or gloss medium.
- Paint – Acrylic paint and watercolors work better than oil paint because they’re less textured when they dry.
- Spray Paint – This is perfect for stencils. Make sure you use this outside. It gets fumy!
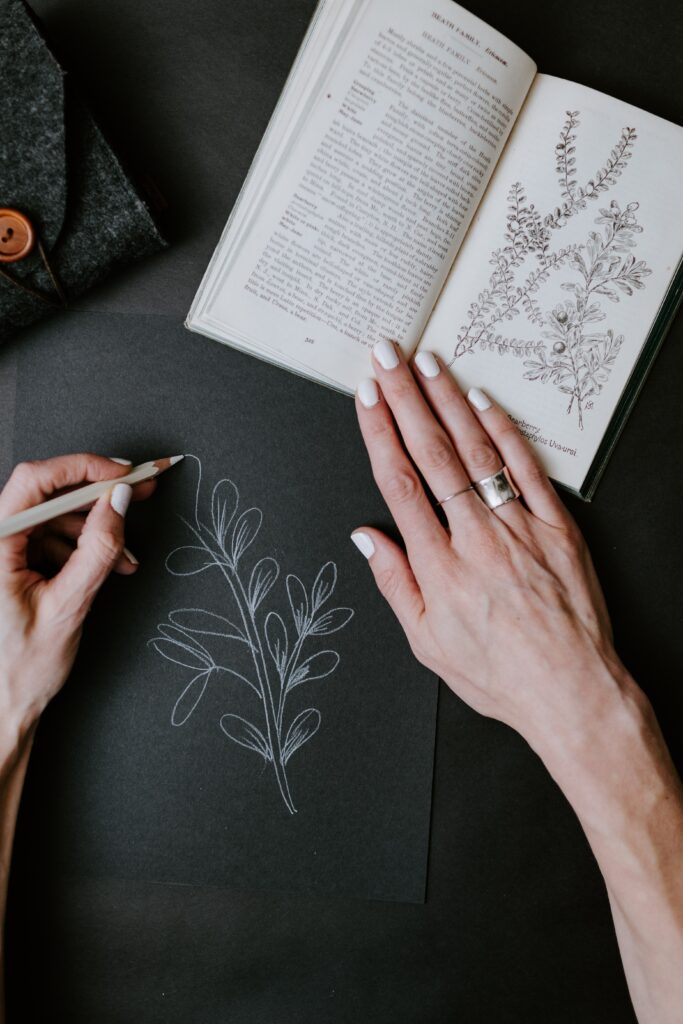
- Markers, colored pencils or calligraphy pens – Drawing your own designs and handwriting the words will give your oracle cards a totally custom look.
- Glitter – Use with caution because it gets everywhere, but I’m kind of obsessed with the stuff.
- Old magazines – Cut out the images that fit your oracle deck theme and adhere them to the cards with tape or glue.
- Photographs – If you have personal photos that fit your theme, go for it!
- Postcards or birthday cards – Infusing your oracle cards with things that hold meaning to you will increase the power of your deck.
- Pressed dried flowers, leaves or grass – get all earthy with it! These adhere to the paper better when you paint the gloss medium or mod podge directly on the paper and again right over the plants as you’re adhering it to your cards.
- Tissue paper – I love cutting out shapes of tissue paper and using gloss medium or watered down Elmer’s glue to stick them on. This creates a “stained glass” look.
- Gift Wrap Paper – This is great for giving the back of the cards a uniform look.
- Scotch tape – I use this for image transfers.
- Clear packing tape – This works for image transfers or as a way to create a smooth finish on your cards. It’s kind of like laminating.
- Whatever the heck you want!
Step 4: Design the Back of Your Cards.
Decide whether you want the back of all the cards to be uniform or more of a “mixed bag”. Traditionally, decks of cards will all have identical “backs”. The benefit of this is you won’t be to identify the cards as you’re drawing them for a reading.
To achieve this uniform look, I recommend using pattern stencils, scrapbooking paper, gift wrap paper, or pieces of masking tape.
The other option is to make each card different. This is not traditional, but it’s super fun. Because you’ll be familiar with differences in your cards, you’ll have to keep your eyes closed when drawing a card, but it could make for an interesting reading for other people who aren’t familiar with the cards. During readings, their intuition can guide them towards a certain color or pattern from your assortment of mini masterpieces.
Another method I love to use for the back of my oracle cards is paper weaving. I take two pieces of colored paper (both the same size) and cut them into strips. I’ll line up one set of strips vertically side-by-side and secure it to a flat surface with tape. Then I weave in the other set of strips horizontally, alternating over and under until all the strips are weaved in. This created a checkerboard look that you can glue to the back of your cards.
Step 5: Design the Front of Your Cards.
Remember that list you made from step two? Take that out and look it over. Assign a design idea to each card in your oracle deck.
You can use whatever medium you like to design and decorate your cards. Just keep in mind, you want these cards to be shuffleable. Go easy on the textured materials.
If you can draw, try sketching out your symbols or characters on the cards. If you’re not that confident in your art skills, find images that fit with your theme and glue them to the cards to create a sort of collage-look.
Tip: It helps to work on one card at a time to keep from getting overwhelmed. Creating these should be fun, not a chore, so only work on them when you’re feeling inspired. Your cards will absorb your energy while you’re making them, so make this process joyful!
Step 6: Create Your Card Meanings.
Gather up all your finished oracle cards and take some time to connect with each one. Hold one card at a time and focus all your attention on it. Close your eyes and notice the energy that the card carries. How does it feel in your hand? Does it bring up any emotions? Then open your eyes and examine the details of the card. Notice what thoughts float through your mind. Ask yourself, “what does this card mean?” Write down your observations and create meanings for each card based on your notes.
You can also do this as you create your cards. Often the creative process can bring up all kinds of ideas, associations, and meanings, and jotting them down to look over later can really help with this step. And don’t be afraid to edit meanings as you get to know your cards more. This should be a fun, fluid process. Don’t overthink it.
Step 7: Make a Unique Cover For Your Deck.
To avoid losing or damaging your cards when you’re not using them, decide on how you want to store them. You can tie them with a ribbon, keep them in a pouch, or store them in a decorative box. I like to keep my cards wrapped in a white cloth that I’d used to wipe my paintbrush on while painting my oracle cards. This leaves me with a beautiful cloth that matches the colors of my deck AND it’s already charged with my creative energy.
Step 8: Discover How to Use Your Oracle Deck.
Experiment with your oracle cards. Try pulling a card a day, or create some spreads around the theme of your deck. Add or take away cards to your deck if you want. This is YOUR creation, so let your oracle deck change and grow along with you!
New to witchcraft?
Sign up for my FREE Witchcraft class!
Editors Note: This post was originally published in May 2018 and has been completely revamped and updated for accuracy and comprehensiveness.